


Dawg Prints Print Drivers
| Package | Install |
|---|---|
| UW-BW | Windows MacOSX |
| UW-COLOR | Windows MacOSX |
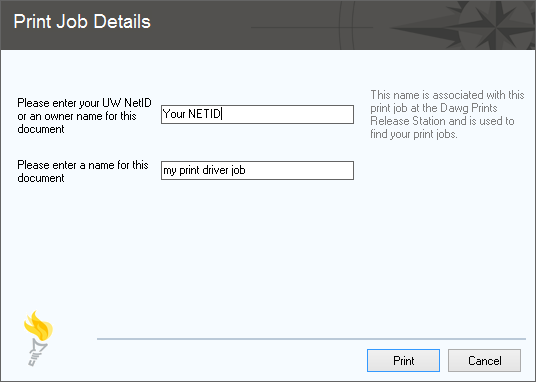
NOTE: Print drivers will be asking for a NETID or an owner name for your print jobs.
Please use your NETID or pick an owner name that is one word, unique, and memorable to you. Make sure there are no spaces in either of your NETID or owner name otherwise you might not find your print job when you go print it at the release station.
Print drivers are not the only way to print to our Dawg Prints printers. You can now alternatively upload your documents at My Print Center and print them at any of our Dawg Prints locations.
NOTE: Your computer needs to be connected to the University of Washington network in order to install the print driver.
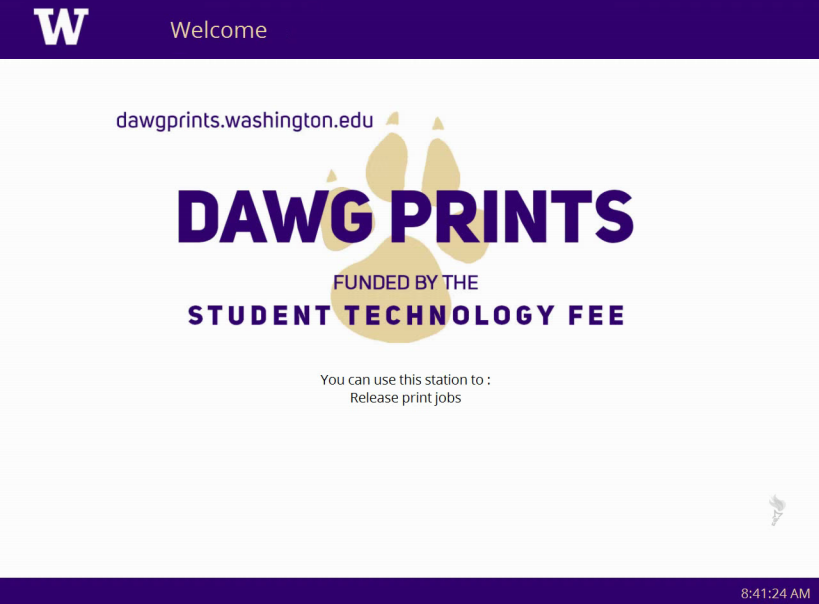
How to Print to a Dawg Prints Station:
- Download and install the Dawg Prints print driver then send your document to that printer
OR you can also upload your document here: https://print.uw.edu/myprintcenter/ - Type in your NETID or an owner name that is one word, easy to remember, and unique to you.
(Your NETID is the first part of your uw email address - NETID@uw.edu)
- Go to your library's or computer lab's Dawg Prints Release Station.
- Type in your NETID or the chosen owner name for your print jobs.
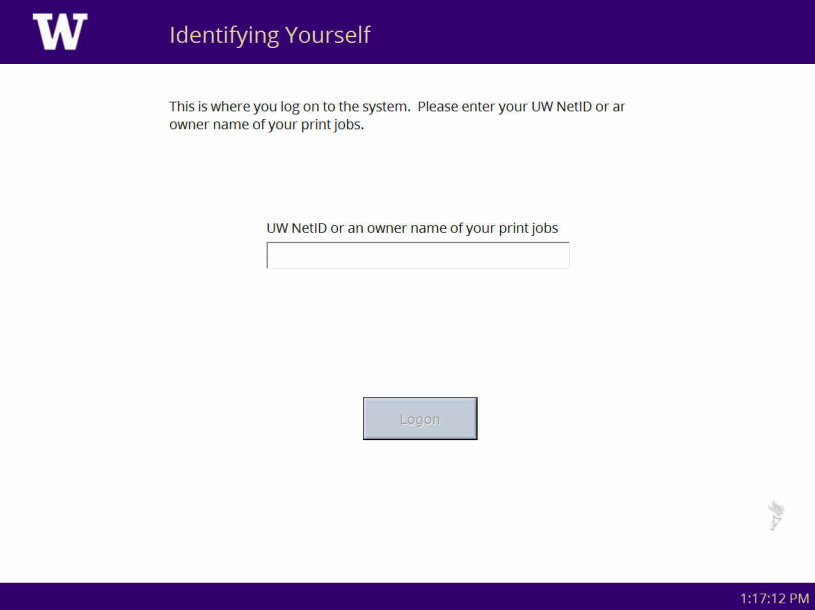
- Swipe your Husky Card or Dawg Prints card.

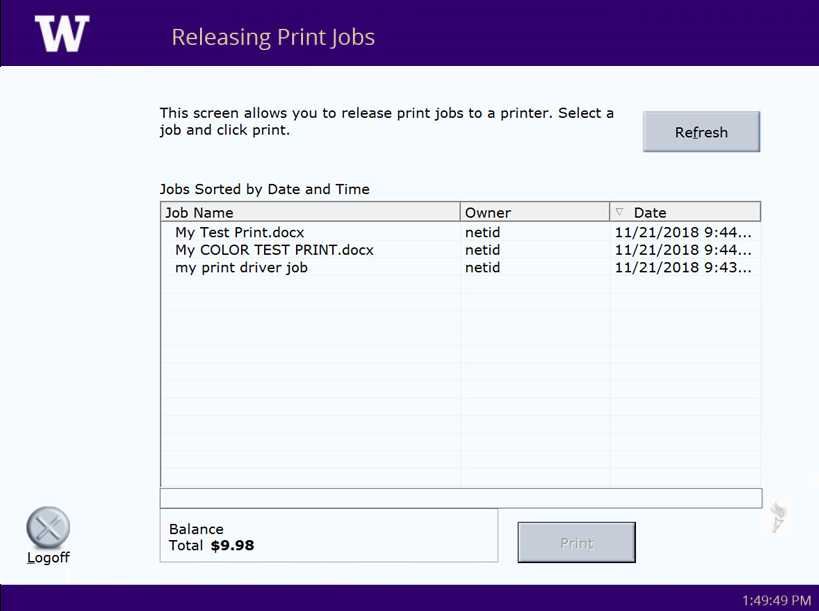
- Select your print job and print!
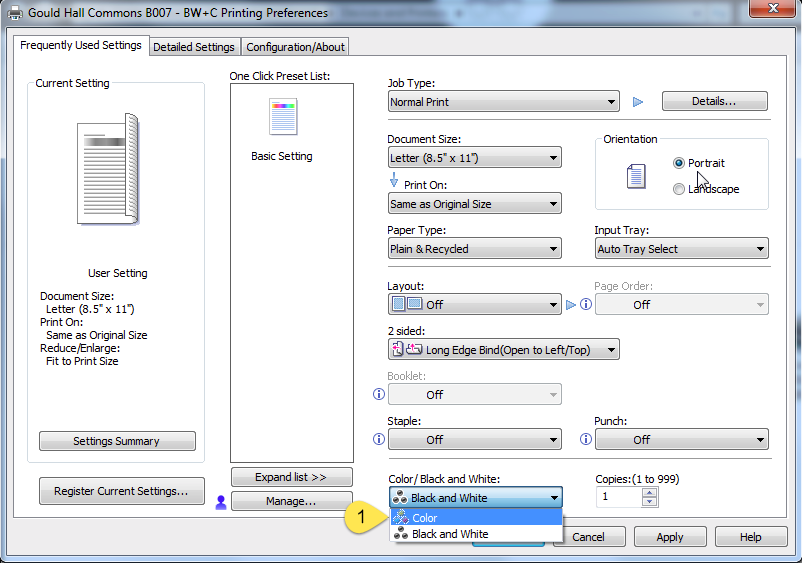
How to Change from Color Printing to B&W Printing:
NOTE: This is only for the Gould Hall and Parrington Hall printers in which case their print drivers for B&W printing and Color printing are the same.
- Go to Devices and Printers.
- Right-click the printer for the popup and click printer preferences.
- The pop-up is below - Click on the dropdown menu for Color/Black and White.
- Click Black and White.
- Click Apply.
REMINDER: For single sided printing, please follow the instruction below under How to Change a Print Job from Double-Sided to Single-Sided.
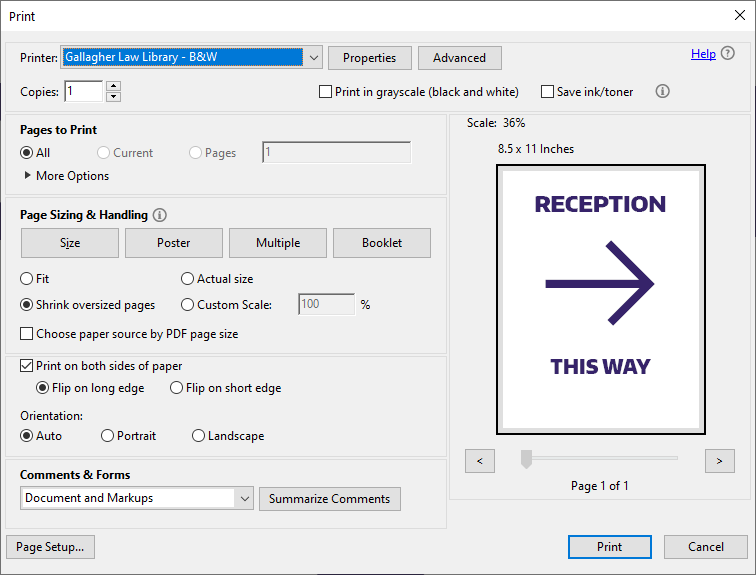
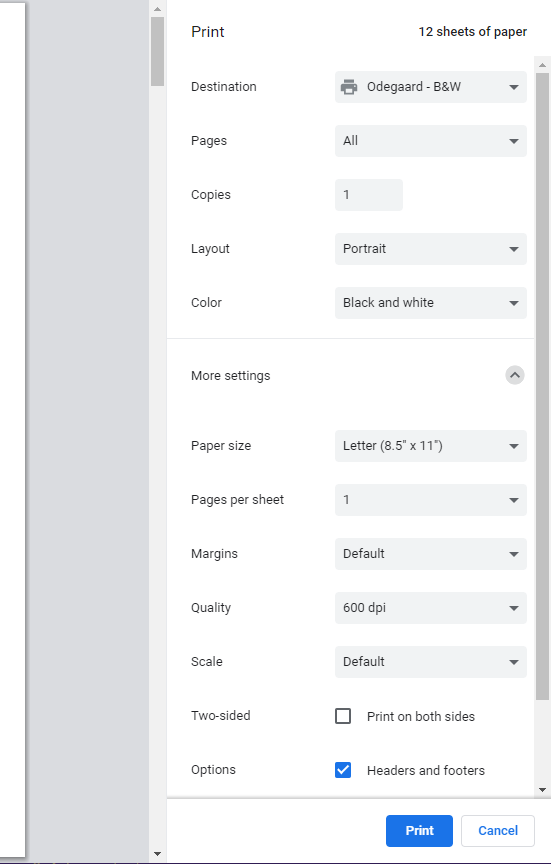
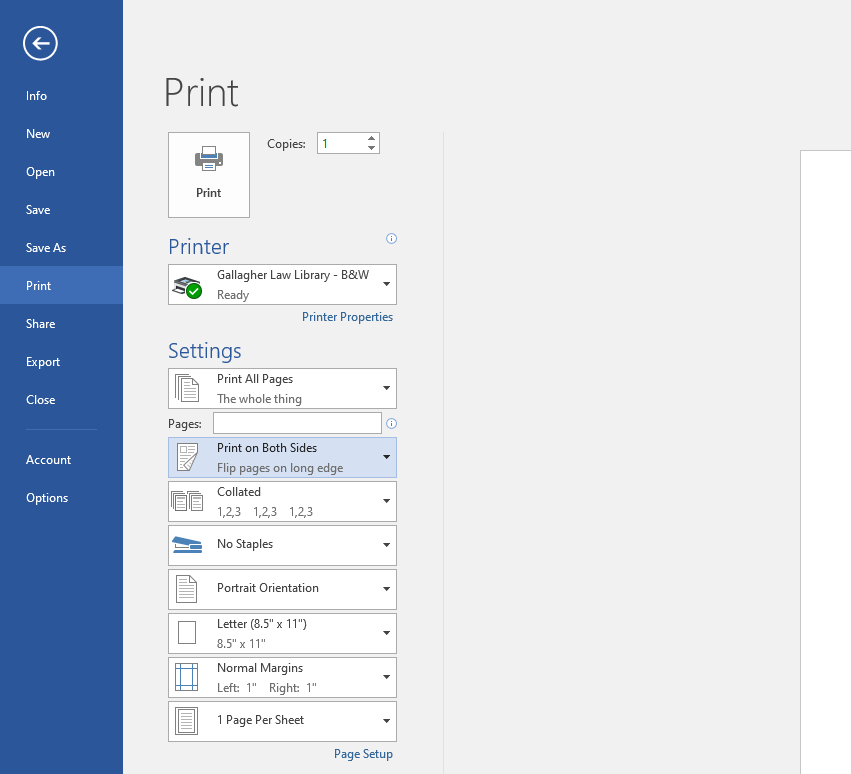
How to Change a Print Job from Double-Sided to Single-Sided:
Printing Guide - 2-Sided (Default Setting) to 1-Sided Printing
- Windows Print Dialog
- Click Print Preview or Print Icon
- Click Properties
- Switch 2-Sided off and click ok on both pop-ups
- Adobe Acrobat
- Click Print Preview or Print Icon on PDF interface
- Uncheck Print on both sides of paper and click Print
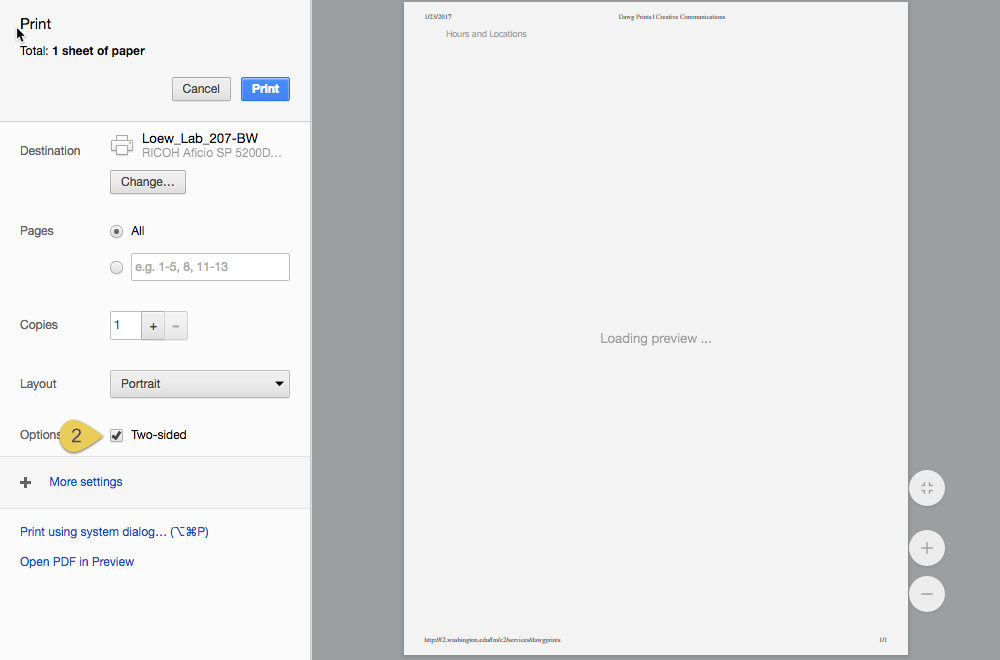
- Browser - Chrome
- Click Print on Browser or right-click -> Print
- Expand More settings
- Check Print on both sides
- Windows - Microsoft Office 2016/2019
- Go to File -> Print or use the printer icon shortcut
- Under Pages, click the bar to bring up the drop down menu
- Select Print One-Sided and click Print
- Mac - Office 2011
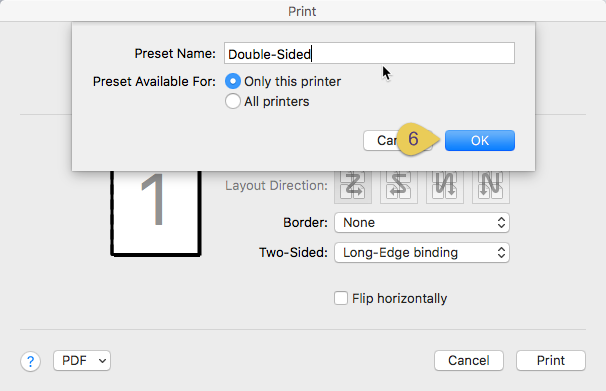
1. File -> Print
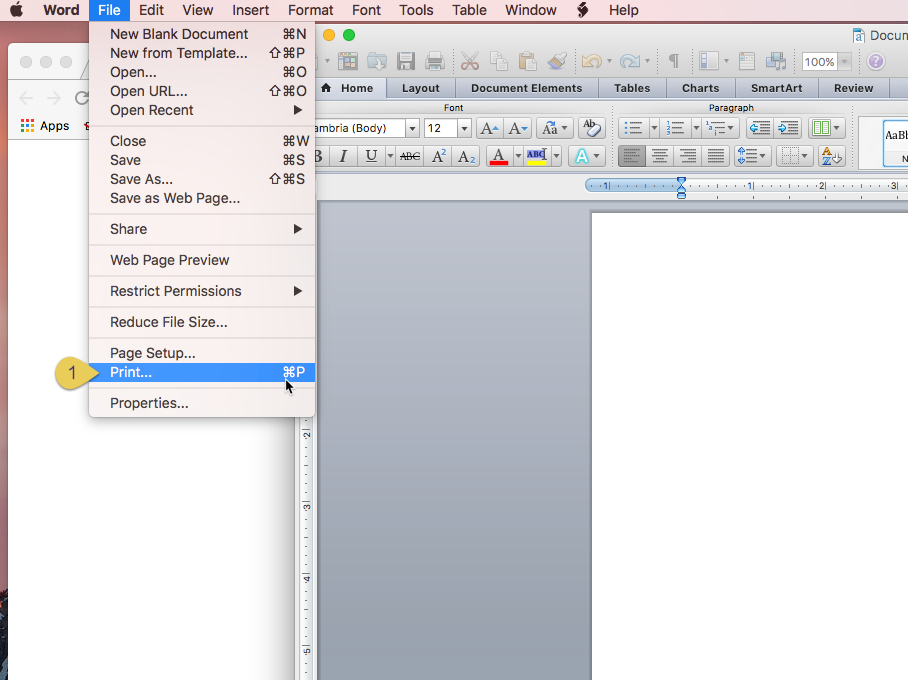
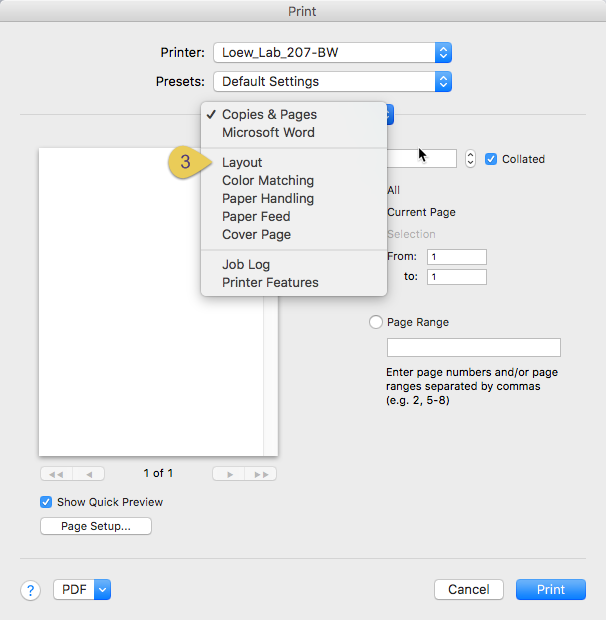
2. From pop-up, click Copies & Pages

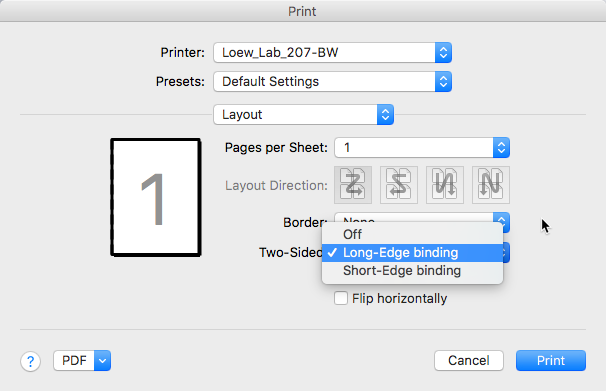
3. From drop down menu, click Layout
4. Turn Two-Sided Off and Hit Print (If you want to save the Preset so you don't have to continue to do these steps every time you want to print single-sided, follow the next two steps)

5. From Preset drop down menu, click Save Current Settings as Preset...
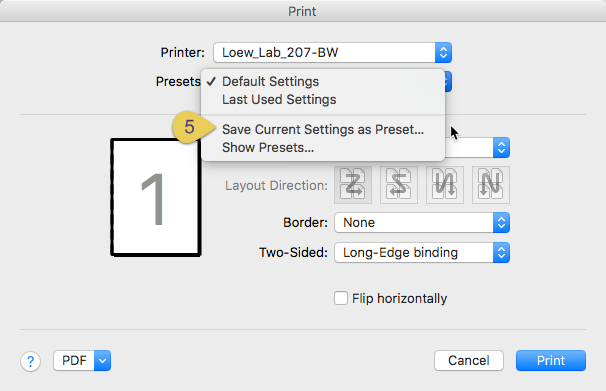
6. Name the Preset "Single-Sided" and click on all printers and hit ok
- This Preset can be used to print single-sided on all campus printers
- Mac Print Dialog
1. Right-click the web page and click print

2. Uncheck the print double-sided for single-sided printing
Supported Paper Sizes
Dawg Prints machines only support standard American paper sizes, like Letter (8.5" x 11"), Legal (8.5" x 14"), and Tabloid (11" x 17"). (not available in all locations)
When printing a document with the native size of A4, for example, you will need to tell the printer to print in one of the three sizes above. Most print drivers also have the option to "fit to print" or "shrink to fit" which will scale your document to fit the standard sizes.
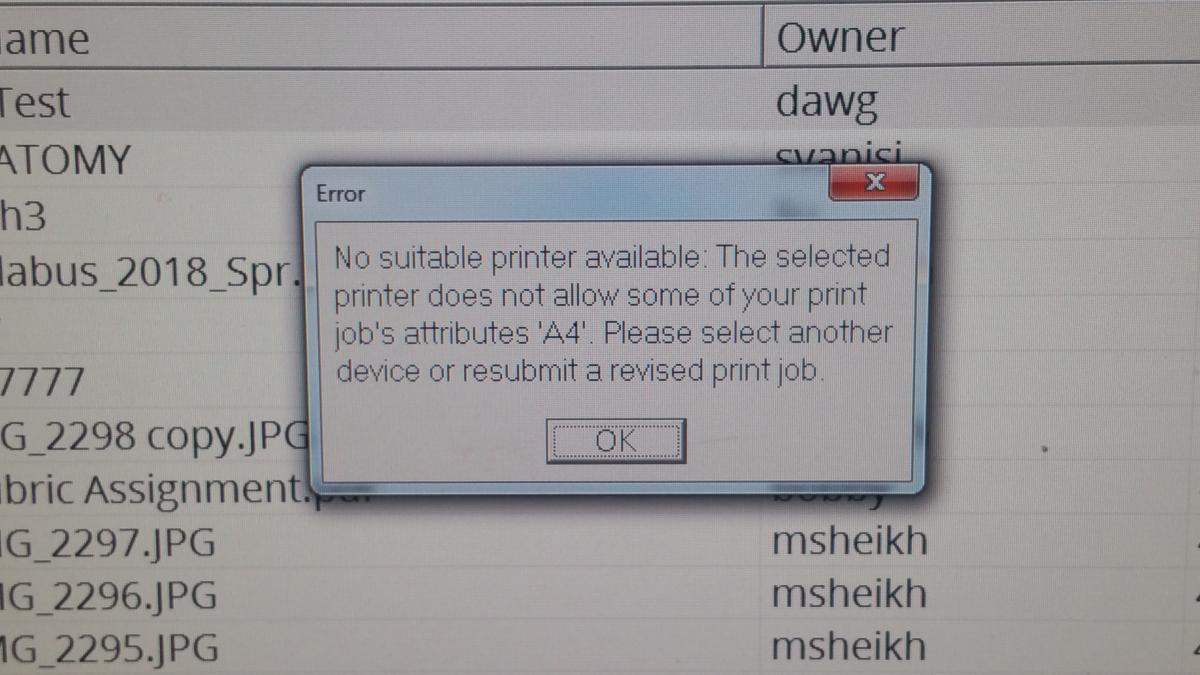
The above error will appear when you try to print an unsupported size.